It’s time to get personal – and add the little details that give this model a sense of realism and connect it to the reference photos we have of Ken Kirk’s Pilkington Merc.
It helps to look back to the December 2019/January 2020 issue of New Zealand Trucking magazine to be reminded of the first steps towards building the Italeri 1:24th scale Mercedes-Benz 6×4 tractor unit. Our build, based on the Pilkington Glass Automotive Division Mercedes-Benz driven by Ken Kirk, is now nearing completion.
This month, we add the finishing touches, taking this build from ‘out of the box’ to ‘as personalised as by Ken’. Looking at our reference photos of Ken’s Mercedes- Benz, we see a handful of accessories that distinguish it.

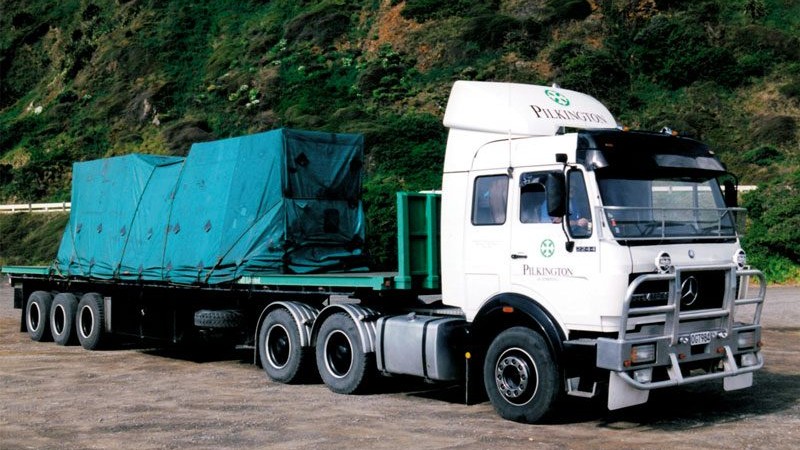
 Our subject matter: The 1989 Mercedes-Benz 2244 Ken Kirk drove for Pilkington Glass Automotive Division, delivering windscreens throughout New Zealand to then-thriving vehicle assembly plants.
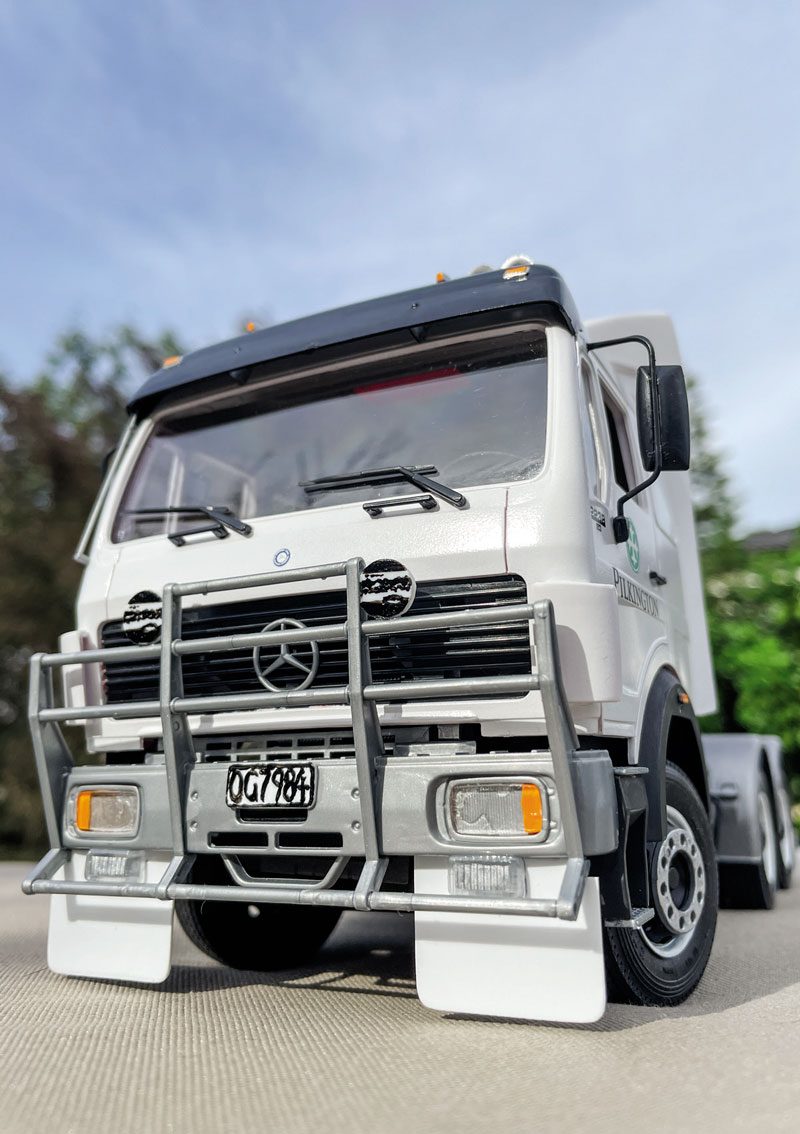
Items seen on real New Zealand rigs are generally not supplied with kitsets. For example, white mudflaps were common in New Zealand in the 1980s but they were rarely seen on the European trucks where the kitset was manufactured. Also, CB aerials, Hella spotlights and, of course, a set of New Zealand number plates are not provided – this is where we need to turn to the spare parts and sheet plastic and get creative.
Here, we will go step-by-step through some basic scratch building of a few key accessories on Ken’s mighty Merc and attach them to our build. The rule of thumb with scratch building is that there are no rules, it is all about looking at what you have and adapting it to achieve the desired result. As you will see here, having a small collection of Evergreen plastic sheets in your collection of odds and sods is worthwhile as you can easily fabricate many parts from sheet styrene plastic.
So, let’s jump right in and complete this project.


Using Evergreen plain 0.75mm sheet styrene plastic, measure the size of mudflap you require and map this out with a sharp pencil on the plastic sheet. Carefully use a sharp hobby knife to cut the plastic sheet – slow and steady wins the race. Use multiple scribing cuts, steadily working your way through the plastic. Note any detail cuts you might need to make to achieve correct fitment. Once test-fitted, apply glue and fix in place. You will notice the natural finish of the Evergreen product is a satin white and very close to the colour and finish of the real mudflaps, so no painting is required.


To make an aerial for the CB radio, use a piece of the sprue the wheels were attached to. It is already silver/grey, so will not require painting. Use the naked flame of a match or a lighter to gently warm the piece of sprue, just enough to make it pliable. Remove the heat of the flame, and while still soft, gently stretch out the sprue to lengthen it while at the same time reducing its gauge down to a fine strand. Hold in place until the plastic sprue has set again, then cut the desired length of antenna from the thin strand with a hobby knife.
Cut a small wedge of Evergreen plain 1.5mm sheet styrene plastic to resemble the aerial base and glue this into location again using acrylic glue so as not to damage the paint. Once the base has set, glue your stretched-plastic sprue ‘aerial’ to the base. It is a bit fiddly, but the result is worth the effort.
Note: It is highly recommended you stretch the sprue in a well-ventilated area and wear a respirator mask. Only apply gentle heat – do not allow the flame to get too close or touch the plastic as it will ignite, and the smoke emitted from burning plastic is toxic if inhaled, so take all necessary precautions.


Because we added the full aero kit to our build using the sprue from Italeri kit No.793, we now have limited space on the roof to fit airhorns. If we go back to the sprue we acquired from kit No.793, we find that there is a pair of airhorns attached that fit our application perfectly. First, assemble the two halves of the horns together and paint. Note that if you leave the main bodies of the horns attached to the sprue, it will make life a lot easier during painting. Remove the completed horns from the sprue and set in place with acrylic glue. Once the glue has set, touch up any missing paint where the horn bodies were attached to the sprue.


On the front of Ken’s Merc, there is a pair of Hella driving spotlights. To replicate these, we start with two small squares of Evergreen plain 1.5mm sheet styrene plastic. Gently nibble these into a basic round shape and use a file to finish shaping these into a tidy circle of the desired size. Paint detail onto the fronts of the circles to represent the real Hella protective covers. A hint: if you stick the circles onto masking tape, they will not move about while you attempt to detail paint. Once the paint has dried, remove from the masking tape and glue into location.


Finally, the last detail to complete our build is the Merc’s Kiwi numberplate. Once again, cut two small rectangles of Evergreen plain 0.75mm sheet styrene plastic to the correct size. Detail paint with the registration number as we did with the detail on the Hella spotlights. When dry, remove from the masking tape and apply to the model. The next step – and the most important of all – is to stand back, admire your efforts, and take a bow. The job is done! Well nearly… next, we will look at building the big Merc’s matching tri-axle flat-deck semi-trailer. Watch this space.