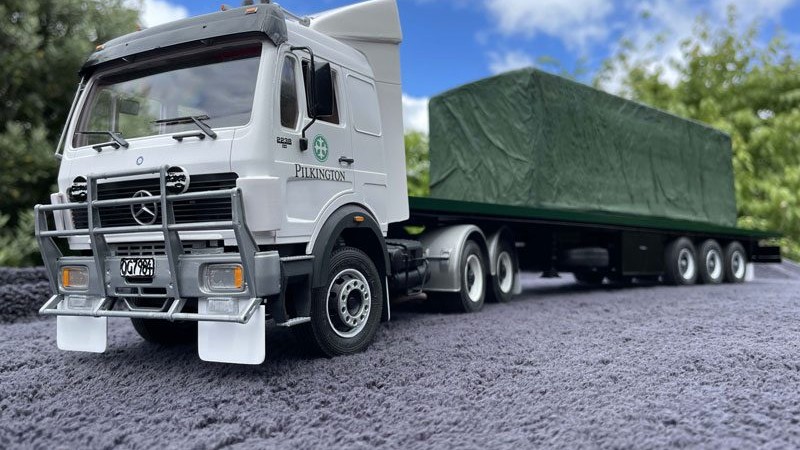
We have made it to the end of our Ken Kirk/Pilkington Automotive Glass Mercedes-Benz build. With just paint and a few finishing touches to add to the trailer, we can load up, tarp up and hit the road.
Following our scratch- building efforts on the flat deck last month, the trailer is ready for paint and final assembly. Let’s start with the main trailer chassis assembly. The first step is to paint the largest area first – the underside, including chassis, suspension and axle sets. Completely mask off the top side of the deck, the headache rack and the coaming rails. Doing this will make life a lot easier when painting the top side, as you will retain the fresh, clean, white plastic surfaces and not have to paint over any overspray.
Following the balance of step 2 in the instructions, we now assemble the wheel sets. The first part of this process is to detail-paint the inner hubs and outer rims, matching the black and white combination on the tractor unit. Allow the paint to dry completely, and then fit the tyres. Remember to run the tyre tread over coarse sandpaper for a scuffed finish that replicates the natural wear and tear of the tread surface.
Once the underside is dry, remove the masking tape from the top side and begin assembly. The likes of our scratch-built underbelly tool locker can be fitted now, then move on to fitting the wheels as per the instruction sheet. The one critical piece of advice here is to be very careful with applying the glue to the ends of the axles. Using too much glue runs the risk of it making its way in between the axle and the wheel and permanently setting it in place. So, a steady hand and easy-does- it is the way forward here. I suggest only fitting the wheels to one side at a time, allowing them to dry thoroughly before flipping over and fitting out the opposite side. This will also help ensure you do not glue the wheels in place.
Finally, apply the detail paint to the likes of the headache rack, coaming rails and taillights. Modern acrylic hobby paints are much more forgiving, and you can add a drop or two of clean water to thin the paint a fraction. This will assist the application and flow of the paint off the brush. A flat brown like Tamiya XF-68 ‘Nato Brown’ will provide a good result when painting the deck of the trailer to resemble plate steel. The best way to apply this is using a wide bristle brush – this way, you can flick the brush and achieve a slightly mottled finish to help replicate the uneven colour of rust-stained steel plate.
The final finishing touch is fitting a set of white mudflaps to the rear guards of the trailer. To do this, use the same technique we applied to the tractor unit, measuring and cutting 0.3mm Evergreen sheet plastic to the correct size. Using a file, round off the corners at the bottom edge of the mudflaps. Once happy with their shape and fit, glue them into place.
Now we have a completed trailer, it is time to back the mighty Mercedes-Benz under the kingpin, connecting the two as a completed unit for the first time. Stand back now and pat yourself on the back because there you have it – your first 1:24th scale model truck and trailer build completed and ready for display.
Next, grab your wallet and head back to the local hobby shop to select your next project. Keep on mini big riggin’!


LOADING THE SEMI